Vue2-基础5

Vue2-基础5

动画效果

在隐藏元素之前执行一段动画

在显示元素之前显示一段动画

1
2
3
4
5
6
7
8
9
10
11
12
13
14
15
16
17
18
19
20
21
22
23
24
25
26
27
28
29
30
31
32
33
34
35
36
37
38
39
40
41
42
43
<template>
<div>
<button @click="show=!show">显示/隐藏</button>
<transition name="come" appear>
<h2 v-show="show">Hello,World!</h2>
</transition>
</div>
</template>

<script>
export default {
name: "Test",
data(){
return {
show: true
}
},
}
</script>

<style scoped>

.come-enter-active {
animation: move 1s linear;
}

.come-leave-active {
animation: move 1s linear reverse;
}

@keyframes move {
from {
transform: translateX(-100%);
}
to {
transform: translateX(0px);
}
}
h2 {
background: greenyellow;
width: 300px
}
</style>

过渡效果

1
2
3
4
5
6
7
8
9
10
11
12
13
14
15
16
17
18
19
20
21
22
23
24
25
26
27
28
29
30
31
32
33
34
35
36
37
38
<template>
<div>
<button @click="show = !isShow">显示/隐藏</button>
<transition-group name="hello" appear>
<h1 v-show="!show" key="1">Hello!</h1>
<h1 v-show="show" key="2">World!</h1>
</transition-group>
</div>
</template>

<script>
export default {
name:'Test',
data() {
return {
show:true
}
},
}
</script>

<style scoped>
h1{
background-color: orange;
}
/* 进入的起点、离开的终点 */
.hello-enter,.hello-leave-to{
transform: translateX(-100%);
}
.hello-enter-active,.hello-leave-active{
transition: 0.5s linear;
}
/* 进入的终点、离开的起点 */
.hello-enter-to,.hello-leave{
transform: translateX(0);
}

</style>

配置代理

发起网络请求我们有以下四种方式

1
2
3
4
1.xhr				window上的对象,原生
2.jQuery 内置了ajax请求,但是本身注重的是DOM节点操作
3.axios 封装了chr,十分轻量,promise风格
4.fetch window上的对象,原生,包装了两层promise

这里我们使用axios来做网络请求

1
npm i axios

CORS(Cross-Origin Resource Sharing )

前端中发出ajax请求的时候经常会出现的一种错误,叫做跨域请求

这是因为违背了同源策略

1、同协议

2、主机名

3、端口号

解决方案

1、后端返回数据的时候,加上一些特殊的响应头即可

2、配置代理服务器

服务器之间互相访问是不受同源策略的限制的

所以我们可以配置一个和我们自己的端口号一致的代理服务器

将请求转发给它

让它去请求其他端口上的服务器得到数据后再将其返回

我们可以使用nginx或者借助vue-cli来配置一个代理服务器

这里我们借助vue-cli

开启代理服务器(方式一)

1
2
3
4
5
module.exports = {
devServer: {
proxy: 'http://localhost:5000'
},
}
  1. 优点:配置简单,请求资源时直接发给前端(8080)即可。
  2. 缺点:不能配置多个代理,不能灵活的控制请求是否走代理。
  3. 工作方式:若按照上述配置代理,当请求了前端不存在的资源时,那么该请求会转发给服务器 (优先匹配前端资源)

开启代理服务器(方式二)

1
2
3
4
5
6
7
8
9
10
11
12
13
14
15
16
module.exports = {
devServer: {
proxy: {
'/hello': {
target: 'http://localhost:5000',
// ws: true, //用于支持websocket
// changeOrigin: true //用于控制请求头中的host值
},
'/demo': {
target: 'http://localhost:5001',
// ws: true, //用于支持websocket
// changeOrigin: true //用于控制请求头中的host值
}
}
}
}
  1. 优点:可以配置多个代理,且可以灵活的控制请求是否走代理。
  2. 缺点:配置略微繁琐,请求资源时必须加前缀。

插槽

让父组件可以向子组件指定位置插入html结构,也是一种组件间通信的方式,适用于 父组件 ===> 子组件

默认插槽

父组件:

1
2
3
<Category>
<div>html结构1</div>
</Category>

子组件:

1
2
3
4
5
6
<template>
<div>
<!-- 定义插槽 -->
<slot>插槽默认内容...</slot>
</div>
</template>

具名插槽

父组件:

1
2
3
4
5
6
7
8
9
<Category>
<template slot="center">
<div>html结构1</div>
</template>

<template v-slot:footer>
<div>html结构2</div>
</template>
</Category>

子组件:

1
2
3
4
5
6
7
<template>
<div>
<!-- 定义插槽 -->
<slot name="center">插槽默认内容...</slot>
<slot name="footer">插槽默认内容...</slot>
</div>
</template>

作用域插槽

作用:数据在组件的自身,但根据数据生成的结构需要组件的使用者来决定。

父组件:

1
2
3
4
5
6
7
8
9
10
11
12
13
14
15
<Category>
<template scope="scopeData">
<!-- 生成的是ul列表 -->
<ul>
<li v-for="g in scopeData.games" :key="g">{{g}}</li>
</ul>
</template>
</Category>

<Category>
<template slot-scope="scopeData">
<!-- 生成的是h4标题 -->
<h4 v-for="g in scopeData.games" :key="g">{{g}}</h4>
</template>
</Category>

子组件:

1
2
3
4
5
6
7
8
9
10
11
12
13
14
15
16
17
18
<template>
<div>
<slot :games="games"></slot>
</div>
</template>

<script>
export default {
name:'Category',
props:['title'],
//数据在子组件自身
data() {
return {
games:['红色警戒','穿越火线','劲舞团','超级玛丽']
}
},
}
</script>

路由

每一个Vue的大型项目都会用到路由,所以这部分十分重要

无路由,无SPA应用


我们回顾一下以前写的web应用的结构

1
2
3
4
- index.html
- user.html
- pay.html
- category.html

然后每个页面中又有链接可以实现互相跳转,这就是典型的多页面应用

SPA应用

(Single page web application):单页面应用

只要点击侧边栏的目录,功能区就会切换到特定的页面,不会刷新页面,实现局部刷新,这就是单页面应用

路由就是用来实现这个切换,路由器就是用来管理这些路由的

概念

路由就是一组key-value的对应关系

多个路由,由一个路由器统一管理

路由分类

后端路由

key就是路径

value就是函数,函数返回对这次请求响应的数据

前端路由

key就是理解

value就是组件,什么样的路径,展示什么样的组件

基本路由

实现以下功能

  1. 默认显示pageA组件
  2. 点击pageA按钮,切换pageA组件
  3. 点击pageB按钮切换pageB组件

安装Vue-router

1
npm i vue-router

安装插件

1
2
3
4
5
6
7
8
9
10
11
import Vue from 'vue'
import App from './App.vue'
import VueRouter from 'vue-router'
import router from './router'

Vue.config.productionTip = false
Vue.use(VueRouter)
new Vue({
render: h => h(App),
router
}).$mount("#app")

创建pageA和pageB组件

1
2
3
4
5
6
7
8
9
10
11
12
13
14
15
<template>
<div>
我是pageA的内容
</div>
</template>

<script>
export default {
name: "PageA"
}
</script>

<style scoped>

</style>
1
2
3
4
5
6
7
8
9
10
11
12
13
14
15
<template>
<div>
我是pageB的内容
</div>
</template>

<script>
export default {
name: "PageB"
}
</script>

<style scoped>

</style>

创建/router文件夹并创建index.js

1
2
3
4
5
6
7
8
9
10
11
12
13
14
15
16
17
18
19
20
21
22
23
// 该文件专门用于创建整个应用的路由器
import VueRouter from 'vue-router'
//引入组件
import PageA from "@/components/PageA";
import PageB from "@/components/PageB";

//创建并暴露一个路由器
export default new VueRouter({
routes:[
{
path: "/",
component: PageA
},
{
path:'/pageA',
component:PageA
},
{
path:'/pageB',
component:PageB
}
]
})

我们先写声明式路由

1
2
3
4
5
6
7
8
9
10
11
12
13
14
15
16
17
18
19
20
21
22
23
24
25
26
27
28
29
30
31
<template>
<div class="container">
<h3>点以下按钮切换页面</h3>
<div style="margin-bottom: 30px;display: flex;width: 120px;justify-content: space-between">
<router-link class="item" active-class="active" to="/pageA">PageA</router-link>
<router-link class="item" active-class="active" to="/pageB">PageB</router-link>
</div>
<router-view/>
</div>
</template>

<script>

export default {
name: 'App'
}
</script>


<style scoped>
.container {
padding: 30px;
}
.active {
color: red;
text-decoration: none;
}
.item {
text-decoration: none;
}
</style>

总结:

1
2
3
4
5
6
7
8
9
10
11
1.	被切换走的组件实际上是被销毁了

2. router-link经过编译后,实际上生成的是a标签,这是声明式路由的一个小弊端
我们后面会使用编程式路由来实现跳转功能,会更加灵活

3. pageA和pageB的实例上都多了两个属性$route$router
$route指的是自身的路由规则和状况
$router是全局的路由器

4. 路由组件(pageA和pageB这种需要路由规则才会显示的组件)一般放在pages文件夹下
一般组件放在components文件夹下

嵌套路由

1
2
3
4
5
6
7
8
9
10
11
12
13
14
15
16
17
18
19
20
21
22
23
24
25
26
27
28
29
30
31
32
33
34
35
// 该文件专门用于创建整个应用的路由器
import VueRouter from 'vue-router'
//引入组件
import PageA from "@/components/PageA";
import PageB from "@/components/PageB";
import PageAA from "@/components/PageAA";
import PageAB from "@/components/PageAB";

//创建并暴露一个路由器
export default new VueRouter({
routes:[
{
path: "/",
component: PageA
},
{
path:'/pageA',
component:PageA,
children: [
{
path: "pageAA",//这里千万不要加上/
component: PageAA
},
{
path: "pageAB",
component: PageAB
},
]
},
{
path:'/pageB',
component:PageB
}
]
})

PageA.vue

1
2
3
4
5
6
7
8
9
10
11
12
13
14
15
16
17
18
19
20
21
<template>
<div>
我是pageA的内容
<ul>
<!--这里要写完整的路径,因为我们有可能会跳转到其他页面去,所以我们必须得写完整的路径-->
<li><router-link to="/pageA/pageAA">pageAA</router-link></li>
<li><router-link to="/pageA/pageAB">pageAB</router-link></li>
</ul>
<router-view></router-view>
</div>
</template>

<script>
export default {
name: "PageA"
}
</script>

<style scoped>

</style>

命名路由

在创建路由器的时候,为路由起名字

1
2
3
4
5
6
7
8
9
10
11
12
13
14
15
16
17
18
19
20
21
22
23
24
25
26
27
28
29
30
31
32
33
34
35
36
37
38
39
40
41
42
43
44
45
// 该文件专门用于创建整个应用的路由器
import VueRouter from 'vue-router'
//引入组件
import PageA from "@/components/PageA";
import PageB from "@/components/PageB";
import PageAA from "@/components/PageAA";
import PageAB from "@/components/PageAB";
import PageContent from "@/components/PageContent";

//创建并暴露一个路由器
export default new VueRouter({
routes:[
{
path: "/",
component: PageA
},
{
path:'/pageA',
component:PageA,
children: [
{
path: "pageAA",
component: PageAA,
},
{
path: "pageAB",
component: PageAB,
children: [
{
//起名
name: "detailRoute",
path: "pageContent",
component: PageContent
}
]
},
]
},
{
path:'/pageB',
component:PageB
}
]
})

那么在切换的时候,就可以使用名字来选择路由了

1
2
3
4
5
6
7
8
<router-link :to="{
name: 'detailRoute',
query: {
pageDetail: p
}
}">
{{p.title}}
</router-link>

query参数

1
2
3
4
5
6
7
8
9
10
11
12
13
14
15
16
17
18
19
20
21
22
23
24
25
26
27
28
29
30
31
32
33
34
35
36
37
38
39
40
41
42
43
44
45
46
47
48
49
<template>
<div>
我是pageAB的内容
<ul>
<li v-for="p in pageList" :key="p.id">
<router-link :to="{
path: '/pageA/pageAB/pageContent',
query: {
pageDetail: p
}
}">
{{p.title}}
</router-link>
</li>
</ul>
<router-view></router-view>
</div>
</template>

<script>
export default {
name: "PageAB",
data(){
return {
pageList: [
{
id: '001',
content: '我是pageABA的内容',
title: 'pageABA',
},
{
id: '002',
content: '我是pageABB的内容',
title: 'pageABB',
},
{
id: '003',
content: '我是pageABC的内容',
title: 'pageABC',
}
]
}
}
}
</script>

<style scoped>

</style>
1
2
3
4
5
6
7
8
9
10
11
12
13
14
15
16
17
18
19
<template>
<div>
<ul>
<li>{{$route.query.pageDetail.id}}</li>
<li>{{$route.query.pageDetail.title}}</li>
<li>{{$route.query.pageDetail.content}}</li>
</ul>
</div>
</template>

<script>
export default {
name: "PageContent"
}
</script>

<style scoped>

</style>

params参数

1
2
3
4
5
6
7
8
9
10
11
12
13
14
15
16
17
18
19
20
21
<li v-for="p in pageList" :key="p.id">
<router-link exact-active-class="active"
:to="`/pageA/pageAB/pageContent/${p.id}/${p.title}/${p.content}`">
{{p.title}}
</router-link>
</li>

<!--或者这样写-->
<li v-for="p in pageList" :key="p.id">
<!--这里必须使用name参数来指定路由,不然会失效-->
<router-link :to="{
name: 'detailRoute',
params: {
id: p.id,
title: p.title,
content: p.title
}
}">
{{p.title}}
</router-link>
</li>
1
2
3
4
5
6
7
8
9
10
11
12
13
14
15
16
17
18
19
20
21
22
23
24
25
26
27
28
29
30
31
32
33
34
35
36
37
38
39
40
41
42
43
// 该文件专门用于创建整个应用的路由器
import VueRouter from 'vue-router'
//引入组件
import PageA from "@/components/PageA";
import PageB from "@/components/PageB";
import PageAA from "@/components/PageAA";
import PageAB from "@/components/PageAB";
import PageContent from "@/components/PageContent";

//创建并暴露一个路由器
export default new VueRouter({
routes:[
{
path: "/",
component: PageA
},
{
path:'/pageA',
component:PageA,
children: [
{
path: "pageAA",
component: PageAA,
},
{
path: "pageAB",
component: PageAB,
children: [
{
name: "detailRoute",
path: "pageContent/:id/:title/:content",
component: PageContent,
}
]
},
]
},
{
path:'/pageB',
component:PageB
}
]
})
1
2
3
4
5
6
7
8
9
10
11
12
13
14
15
<template>
<div>
<ul>
<li>{{$route.params.id}}</li>
<li>{{$route.params.title}}</li>
<li>{{$route.params.content}}</li>
</ul>
</div>
</template>

<script>
export default {
name: "PageContent"
}
</script>

query和params的区别

1
2
3
4
1.	query的对象写法中,path可以是路径也可以是路由名
但是params必须是路由名

2. params需要在路由器的配置文件中提前声明

props配置

我们发现读取queryparams传过来的参数的时候

需要不断使用$route.query.xxx或者$route.params.xxx,十分繁琐

如果需要简化,则需要使用props配置项

1
2
3
4
5
6
7
8
9
10
11
12
13
14
15
16
17
18
19
20
21
22
23
24
25
26
27
28
{
path: "pageAB",
component: PageAB,
children: [
{
name: "detailRoute",
path: "pageContent/:id/:title/:content",
component: PageContent,
//第一种写法,该对象的所有kv都会以props的形式传给该组件
// props: {
// a: 'a',
// b: 'b',
// }

//props的第二种写法,值为布尔值,若布尔值为真,就会把该路由组件收到的所有params参数,以props的形式传给该组件。
//props: true,

//props的第三种写法,值为函数,推荐
props($route){
return {
id:$route.query.id,
title:$route.query.title,
content:$route.query.content
}
}
}
]
}

replace属性

使用router-link标签实现跳转,浏览器对于历史记录的存储是这样的

这种模式叫push模式

它将一条条记录压入栈中


如果我们想实现以下这种模式

这种模式叫replace模式

它将上一条记录覆盖下一条记录


router-link默认是push模式

增加replace属性以使用replace模式

1
<router-link class="item" replace active-class="active" to="/pageA">PageA</router-link>

编程式路由

修改以上案例

1、切换pageA、pageB的a改为button

2、以push模式切换pageA

3、以replace模式切换pageB

4、前进、后退

1
2
3
4
5
6
7
8
9
10
11
12
13
14
15
16
17
18
19
20
21
22
23
24
25
26
27
28
29
30
31
32
33
34
35
36
37
38
39
40
41
42
43
44
45
46
47
48
49
50
51
52
53
54
55
56
57
58
<template>
<div class="container">
<h3>点以下按钮切换页面</h3>
<div class="buttons">
<button @click="goBack">后退</button>
<button @click="goForward">前进</button>
</div>
<div class="buttons">
<button @click="gotoPageA">PageA</button>
<button @click="gotoPageB">PageB</button>

<!-- <router-link class="item" replace active-class="active" to="/pageA">PageA</router-link>-->
<!-- <router-link class="item" active-class="active" to="/pageB">PageB</router-link>-->
</div>
<router-view/>
</div>
</template>

<script>

export default {
name: 'App',
methods:{
gotoPageA(){
this.$router.push("/pageA")
},
gotoPageB(){
this.$router.replace("/pageB")
},
goBack(){
this.$router.back();
},
goForward(){
this.$router.forward();
},
}
}
</script>


<style>
.container {
padding: 30px;
}
.active {
color: red;
text-decoration: none;
}
.item {
text-decoration: none;
}
.buttons {
margin-bottom: 30px;
display: flex;
width: 120px;
justify-content: space-between;
}
</style>

编程式路由导航就是不通过router-link实现

而是手动使用router控制的路由跳转

1
2
3
4
5
6
7
8
9
10
11
12
13
1. 如果要传入参数,就不能使用字符串了,而是要使用对象写法
gotoDetail(p){
this.$router.push({
name: 'detailRoute',
params: {
id: p.id,
title: p.title,
content: p.title
}
});
}

2. 编程式路由会更加灵活,不是说router-link不好

缓存路由组件

现在再加一个需求在下图出加入一个input组件,然后再pageAA和pageAB之间跳转的时候,input中的数据不会丢失

之前我们说过,组件被切换走后,会被销毁

那么我们如何阻止这次的销毁呢

只要在pageA的组件中将router-view用keep-alive包裹即可

1
2
3
4
5
6
7
8
9
10
11
12
13
14
15
16
17
18
19
20
21
22
23
24
25
26
27
28
29
30
<template>
<div>
我是pageA的内容
<ul>
<li><router-link to="/pageA/pageAA" active-class="active">pageAA</router-link></li>
<li><router-link to="/pageA/pageAB" active-class="active">pageAB</router-link></li>
</ul>
<keep-alive include="PageAB">
<router-view></router-view>
</keep-alive>
<!--
这里也可以这样写,缓存这个路由视图中的PageAB组件
<keep-alive :include="['PageAB']">
<router-view></router-view>
</keep-alive>
-->
<!--
这里不写inclue属性的话,这个视图中所有的组件都会被缓存
<keep-alive>
<router-view></router-view>
</keep-alive>
-->
</div>
</template>

<script>
export default {
name: "PageA"
}
</script>

新的生命周期钩子

在这个地方展示一个透明度一直发生改变的文字

1
2
3
<li :style="{opacity}">
加油!!!
</li>

然后开启一个定时器,对opacity的值进行操作

1
2
3
4
5
6
7
8
9
mounted() {
this.timer = setInterval(()=>{
this.opacity-=0.01;
if(this.opacity<=0) this.opacity=1
},16);
},
beforeDestroy() {
clearInterval(this.timer);
}

这里其实就出现了问题

我们已经将其设置为了缓存路由

那么当我们切换到其他组件的时候

该定时器还在周而复始的跑,这是不对的

这时候就需要两个新的路由钩子

这是路由独有的两个钩子

1
2
3
4
5
6
7
8
9
10
11
activated() {
// 当切换到该组件,则该回调被调用
this.timer = setInterval(()=>{
this.opacity-=0.01;
if(this.opacity<=0) this.opacity=1
},16);
},
deactivated() {
// 当该组件被切换走,则调用该回调
clearInterval(this.timer);
}

路由守卫

全局路由守卫
1
2
3
4
5
6
7
8
9
10
//全局前置路由守卫————初始化的时候被调用、每次路由切换之前被调用,使用next()放行
// to和from都是route信息
router.beforeEach((to,from,next)=>{
console.log('前置路由守卫',to,from,next)
})

//全局后置路由守卫————初始化的时候被调用、每次路由切换之后被调用
router.afterEach((to,from)=>{
console.log('后置路由守卫',to,from)
})
独享路由守卫

在路由器的路由规则中配置以下逻辑

独享路由守卫没有后置的守卫

1
2
3
4
5
6
7
8
{
name:'detailRoute',
path:'pageContent',
component:News,
beforeEnter: (to, from, next) => {
console.log('独享前置路由守卫',to,from)
}
},
组件路由守卫

在组件中加入以下逻辑

1
2
3
4
5
6
7
8
9
//通过路由规则,进入该组件时被调用
beforeRouteEnter (to, from, next) {
console.log('beforeRouteEnter',to,from)
},

//通过路由规则,离开该组件时被调用
beforeRouteLeave (to, from, next) {
console.log('beforeRouteLeave',to,from)
}

三个路由守卫可以配合使用哦

history模式和hash模式

我们看到地址栏中始终有#号

#后面的路径都不会发送给服务器

若以后将地址通过第三方手机app分享,若app校验严格,则地址会被标记为不合法。

那么如何切换模式呢?

vue-router默认开启的是hash模式,如果想要切换模式,只需要在创建路由器的时候,传入一个配置项mode: 'history'

这时候你会发现地址栏的#都不见了

讲到这里,有的小伙伴肯定要说了,那我肯定要使用history模式,这样的路径看着才舒服

history模式下,路径确实舒服,但是hash模式的兼容性比较好,history涉及到一个项目上线的问题

我们使用npm run build打包

然后你就发现了出现了一个特殊的文件夹

history模式部署上线

我们使用express搭建一个微型的服务器来部署我们的前端项目

1、新建文件夹

mkdir server

2、初始化项目

npm init

3、安装express

npm i express

4、创建static文件夹将dist目录下的所有文件放到其中

5、创建server.js并编写服务器端代码

1
2
3
4
5
6
7
8
9
10
11
const express = require('express');

const app = express();

app.use(express.static(__dirname+'/static'));

app.listen(5005,(err)=>{
if(!err){
console.log('服务器启动成功');
}
})

6、启动服务器

node server.js

7、访问localhost:5005并点击

出现问题

这时候这个大问题就出现了,我们刷新页面

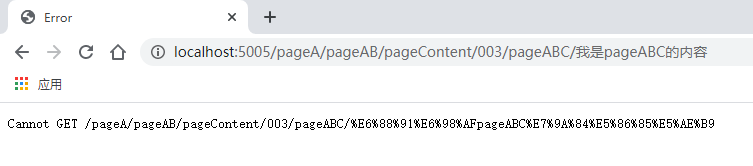
我们发现了404错误,这是为什么呢?因为服务器并没有该资源

hash模式部署上线

那我们使用hash模式再次build,访问尝试

再次刷新,发现并没有出现404

解决history模式的问题

我们再次回到history模式,来解决该问题

这个问题需要后端来配合

我们这里使用nodejs做后端,所以我们使用nodejs的技术来解决问题

安装一个库npm install --save connect-history-api-fallback

1
2
3
4
5
6
7
8
9
10
11
12
const express = require('express');
const history = require('connect-history-api-fallback');

const app = express();
app.use(history())
app.use(express.static(__dirname+'/static'));

app.listen(5005,(err)=>{
if(!err){
console.log('服务器启动成功');
}
})

组件库

我们真正开发项目的时候,我们不会所有的页面结构都是自己写,我们会使用第三方的组件库,接下来我来介绍几个比较常用的组件库

如果想使用这些组件库,我们只需要去这些官网查看官方文档即可

给作者买杯咖啡吧~~~